

2015-10-07 15:00:00
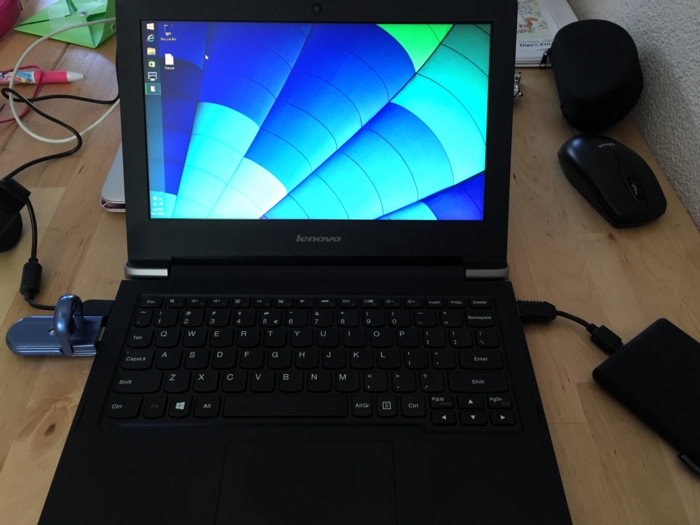
In preparation of the recent PvIB penetration testing workshop, I was looking for a safe way to participate in the CTF. I was loathe of wiping my sole computer, my Macbook Air and I also didn't want to use my old Macbook which is now in use as my daughter's plaything. Luckily my IT Gilde buddy Mark Janssen had a great suggestion: the Lenovo Ideapad s21e-20.
Tweakers.net gave it a basic 6,0 out of 10 and I'd agree: it's a very basic laptop at a very affordable price. At €180 it gives me a wonderfully portable system (light and good formfactor), with a decent 11.6" screen, an okay keyboard and too little storage. Storage is the biggest issue for the purposes I had in mind! Biggest annoyance is that the touchpad doesn't work under Linux without lots of fidgetting.
I wanted to retain the original Windows 8 installation on the system, while allowing it to dual-boot Kali Linux. In order to get it completely up and running, here's the process I followed. You will need a bunch of extra hardware to get it all up and running.
So here we go!
The good thing is that you won't need to mess around with extra settings to actually boot from the SDHC card! On older Ideapad laptops this was a lot of hassle and required extra work to boot from SD.
Now, we're almost there!
And there we have it! Your Ideadpad s21e is now dual-booting Windows 8 and Kali Linux. Don't forget to clone the drives to a backup drive, so you won't have to redo all of these steps every time you visit a hacking event :) Just clone the backup back onto the system afterwards, to wipe your whole system (sans UEFI and USB controllers).
kilala.nl tags: work, sysadmin, security, ctf,
View or add comments (curr. 0)
2015-10-07 06:32:00
Last night I attended PvIB's annual pen-testing event with a number of friends and colleagues. First impressions? It's time for me to enroll as member of PvIB because their work is well worth it!
In preparation to the event I prepared a minimalistic notebook computer with a Windows 8 and Kali Linux dual-boot. Why Kali? Because it's a light-weight and cross-hardware Linux installer that's chock-full of security tools! Just about anything I might need was pre-installed and anything else was an apt-get away.
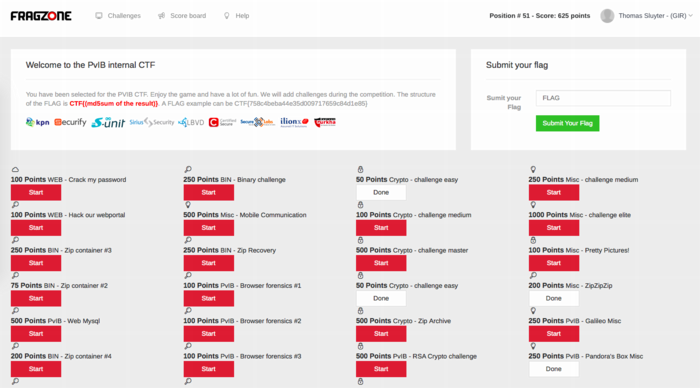
Traveling to the event I expected to do some networking, meeting a lot of new people by doing the rounds a bit while trying to pick up tidbits from the table coaches going around the room. Instead, I found myself engrossed in a wonderfully prepared CTF competition. In this case, we weren't running around the conference hall, trying to capture each other's flags :D The screenshot above shows how things worked:
I had no illusions of my skillset, so I went into the evening to have fun, to learn and to meet new folks. I completely forgot to network, so instead I hung out with a great group of students from HS Leiden, all of whom ended up really high in the rankings. While I was poking around 50-200 point challenges, they were diving deeply into virtual machine images searching for hidden rootkits and other such hardcore stuff. It was great listening to their banter and their back-and-forth with the table coach, trying to figure out what the heck they were up to :)
I ended up in 49th place out of 85 participants with 625 points. That's mostly middle of the pack, while the top 16 scored over 1400 (#1 took 3100!!) and the top 32 scoring over 875.
Challenges that I managed to tackle included:
Together with Cynthia from HSL, we also tried to figure out:
The latter was a wonderful test and we almost had it! Using various clues from the web, which involved multiple steganography tools provided by Alan Eliason, ImageMagick and VLC. We assumed it was a motion-jpeg image with differences in the three frames detected, but that wasn't it. Turns out it -was- in fact steganography using steghide.
Ironically the very first test proved very annoying to me, as the MD5 sum of the string I found kept being rejected. It wasn't until our coach hinted at ending NULL characters that I switched from "cat $FILE | md5sum" to "echo -n $STRING | md5sum". And that's what made it work.
To sum things up: was I doing any pen-testing? No. Did I learn new things? Absolutely! Did I have a lot of fun? Damn right! :)
kilala.nl tags: work, sysadmin, security, ctf,
View or add comments (curr. 0)
All content, with exception of "borrowed" blogpost images, or unless otherwise indicated, is copyright of Tess Sluijter. The character Kilala the cat-demon is copyright of Rumiko Takahashi and used here without permission.